This isn't a baking blog or a ministry blog (but I'll talk about those), and it's not a gardening blog (goodness, no). This is just a blog about anything, and maybe everything, that I'm thinking about right now.


Showing posts with label Recipes. Show all posts

Saturday, March 3, 2012

Garlic Rosemary Bread

Photo source, because I forgot to take a picture of my bread!  But it looks like this, more or less. 

Last Thursday I took my Garlic Rosemary Bread to our Bible study's salad luncheon.  Not being much of a salad person I always ask if I can bring bread.  This bread goes particularly well with salad, because it had a fresh, herby flavor.  Oh, and if salad is your thing, you might like to know that this bread is 100% whole wheat, too.

I got lots of requests for the recipe, so here it is:

Garlic Rosemary Bread (makes 1 round loaf, 12 slices)
(which, incidentally, I called Rosemary Garlic Bread in my cookbook, so from now on I reserve the right to use either title)
3/4 cups water
1/4 cup buttermilk
2 tbsp olive oil
1 tbsp. honey
3/4 tsp. salt
3 cups whole wheat flour
2 tsp. instant or rapid rise or dry active yeast (1 pkg. is fine)
3/4 tsp. dried dill weed
3/4 tsp dried basil
3/4 tsp. dried rosemary
1/2 tbsp. minced garlic
1 egg, for glaze
1 tbsp. water, for glaze

In a 2 cup measuring cup, combine water, buttermilk, olive oil, honey and salt.  Microwave for about 30 seconds until the liquid is warm like a mellow hot tub.  In a large mixing bowl, combine flour, yeast, herbs, and garlic.  Add wet ingredients and stir to combine.  Let it sit for about 10 minutes, covered.  Knead well - very well.  I use a Kitchenaid with a kneading hook, on medium power for about 5 minutes.  At this point, if you've used instant yeast you can form the loaf into a ball and let it rise, on parchment paper, until doubled.  If you are using rapid rise or dry active yeast, let it rise until doubled in covered bowl, in a warm place.  Then form the dough into a ball, place it on parchment paper, and let it rise for baking.  After the dough has been shaped, while it is rising, preheat the oven to 350 degrees.  Preheat a baking stone if you have one.  Combine the egg and water in a small bowl.  Brush the top of the loaf with the egg wash.  Slash the loaf, if desired.  Slide dough on the parchment paper, onto a baking sheet (or your heated stone).  Bake for 30 minutes.  Remove to wire rack to cool. 


Besides an accompaniment to salad, my preferred use for this bread is grilled cheese.


Yes, this is a Christmas plate.  In March.  What about it??


The Ultimate Grilled Cheese Sandwich.  This one, my favorite, has Tillamook cheddar cheese, Monterey Jack cheese, a sprinkling of Penzey's shallot salt, and a sprinkling of smoked Spanish paprika (also Penzey's) all layered on my Rosemary Garlic Bread.  Oh, and another very important thing...


The George Foreman Grill.  Yep.  I've made a lot of grilled cheese sandwiches in my time, even putting considerable effort into perfecting the cast iron grilled cheese sandwich.  But nothing beats this handy little tool that we got as a wedding gift.

And then, wouldn't you know it, as I was eating my yummy sandwich, I knew it was missing something.  You know, too, don't you?  Yes, it definitely needed some soup.


So I pulled out a bit of Pioneer Woman's Sherried Tomato Soup and made a meal of it!

I hope you enjoy this bread as much as I have!


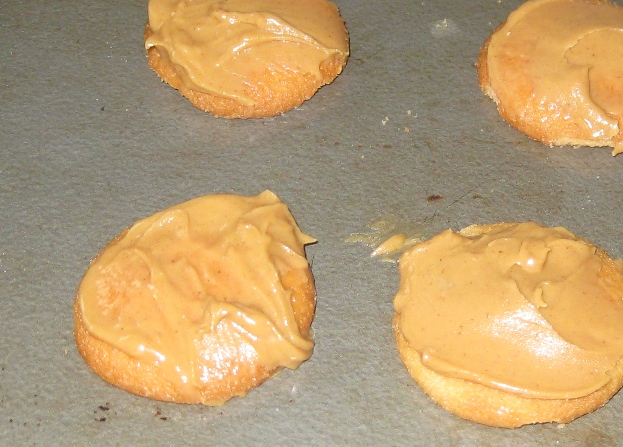
Public Service Announcement: Sorry my pictures are so terrible in this post.  I used my phone because I couldn't find my camera.  This is why...


Tuesday, January 10, 2012

Steakhouse Pizza for the New Year

October is for Halloween, which means skeletons and costumes; November is for Thanksgiving, which means cooking tools and Pilgrims; December is for Christmas, which means baked goods and Santas.  But what do the stores sell in January?  Exercise equipment and organizational supplies, of course!

Those retailers know their customers!  They know that after months of indulging in too many mashed potatoes (made with real cream, of course), and buttered biscuits, and cookies, and candy, we take a step back from the mirror and groan.

Why don't my pants fit anymore?  Did this always stick out like this?  Did my clothes shrink in the wash?

So we make promises that we're going to start exercising and eating healthier.  And lucky for us, the Food Network and cooking magazines know all about it also, so they offer us lots of healthier, lighter, fresher recipes.

Well, I'm here to admit that Steve and I have done just what they expect.  All week (one week so far!) we've eaten healthy dinners together.  

Honestly I'm kind of proud of my healthy recipe repertoire.  And I've found several new ones as well!

And, as always, when I've found a great new recipe, I can't wait to share it with my friends. (You.)

Well, you're not going to believe this one, but I'm telling you, it was good!

Here it is:  (Ready??)

Cauliflower Crust Pizza


Yep.

And Portobello Steak Pizza


Here are some recipes for you, and a few notes along the way:
(Oh, and I should mention that "healthy" here can be interpreted in different ways.  When Steve and I are doing a fat loss bootcamp we eat regular/healthy breakfasts and lunches, but for dinner we go low/no carb.  These recipes are loaded with healthy veggies and good protein, but aren't necessarily low in fat as they are written.  Okay, qualifier over-and-out.)

Cauliflower Pizza Crust (recipe from Sparkpeople, here)
(Serves 2 - I made 2 for our family of four - my kids loved it!)
1 cup cooked cauliflower (I steamed it lightly), mashed and well-drained
1 egg (try 2 egg whites)
1 cup shredded cheddar cheese
herbs, as you like (I forgot these, and don't think I'll add them next time)

Combine all the ingredients.  Spread onto a parchment-lined baking sheet (or stone).  Bake at 450 degrees for 12-15 minutes.  Cover with toppings as you like.  Bake for 10 more minutes or so, until toppings are warmed and cheese is melted.  (I made one with regular pizza sauce and cheese; and one following Pioneer Woman's recipe for Steakhouse Pizza - yum!!!)

Portobello Pizzas
(2 portobello mushroom caps is a good amount for one person.)

Scrape the gills from underneath 2 portobello mushroom caps.  Cut off the stem.  Place on a baking sheet covered with greased aluminum foil.  Bake at 450 for 5-10 minutes, just to soften.  Top with the pizza toppings you like (I highly recommend those PW Steakhouse Pizza toppings!)  Bake for 5-10 minutes to melt the cheese and warm the toppings.

Saturday, November 19, 2011

A Thanksgiving Feast: Part 2

This is part 2 of the post I started yesterday with recipes for your Thanksgiving feast.  Enjoy!


Green Bean Casserole
Most people like to use the recipe on the back of a can of French's onions.  If that's your preference, have at it!  Those are good green beans.  But our family uses a different recipe. Here's ours:
2 1/2 cups fresh bread cubes (appx. 6 slices)
1 stick butter, melted
4 cans (3 oz each) sliced mushrooms, drained
3 cans (15.5 oz each) cut green beans, drained
1/4 tsp. salt
1/8 tsp. pepper
3 tbsp. onion
1 cup milk
2 cans cream of mushroom soup
1/4 cup sliced almonds

In a bowl, toss bread cubes and butter.  Spread half in a greased 9x13 dish.  Sprinkle with mushrooms, then green beans, then salt and pepper and then onion.  In a bowl, mix milk and soup.  Pour evenly into the baking dish.  Sprinkle with remaining bread cubes and then sliced almonds.  Bake at 400 for 30 minutes, or 375 for 40 minutes, or until heated.

The easy way: A can of green beans dressed up with sliced almonds.

Source


Sweet Potatoes
2 cans (15 oz each) sweet potatoes or yams, drained
1/4 cup butter
1/4 cup orange juice
1/2 tsp. cinnamon
1/4 tsp. nutmeg
2 cups marshmallows, not small

Place sweet potatoes in a greased 1-quart baking dish.  Mash them just a little bit, if you want.  (I leave them mostly whole.)  Stir together the butter, oj, cinnamon and nutmeg.  Pour that over the potatoes.  Top with marshmallows.  Bake at 350 for 20-30 minutes, until heated through and marshmallows are lightly browned.  Serves 6-8.

Source


Cranberry Sauce
Make this one easy on yourself and mix up a can of whole berry cranberries with a couple tablespoons of orange marmalade.  Do it the day before and refrigerate it until the feast.  Make sure you put out a can of the jellied cranberry sauce  for everyone who grew up loving it.  (You know, the kind that stays the shape of the can.)

Or, if you're willing to give the real thing a try, check out this recipe using fresh cranberries.  It looks good!


Source


Orange Rolls
Dress up regular Pillsbury crescent rolls by brushing them with a glaze of 2 tbsp.softened butter, 2 tbsp. honey, and 1 tsp. orange zest right after they come out of the oven.


Source


Pumpkin Pie
We think Libby's knows their pumpkin and their pumpkin pie recipe is great!
2 eggs
3/4 cup sugar
1/2 tsp. salt
1 tsp. cinnamon
1/2 tsp. ginger
1/4 tsp. cloves
1 can (15 oz) pumpkin
1 can evaporated milk
1 unbaked pie shell

Beat eggs in a bowl.  Add sugar, salt, cinnamon, ginger, cloves.  Add pumpkin and evaporated milk.  Mix very well.  Pour into pie shell.  Bake at 425 for 15 minutes.  Reduce heat to 350.  Bake 40-50 minutes more.

The easy way: Buy a frozen pie and bake it!

Source

Friday, November 18, 2011

A Thankgiving Feast: Part 1

Source


(This got long, so I broke it into two posts.  Part 2 coming tomorrow.)

Do you cook your own Thanksgiving meal?  Or do you have a tradition that includes someone else doing the cooking?

If you do the cooking, do you remember the first time you had to cook the Thanksgiving meal?

I remember my first time.  We were living in Barcelona, Spain.  Our team was cooking mashed potatoes, cranberry sauce, green bean casserole, stuffing and pumpkin pies for - get this - 100 people!  We used the American Thanksgiving tradition as a way to introduce the Gospel to our Spanish friends.  Lucky for us, a local restaurant cooked all the turkeys.  But I was even more nervous that first Thanksgiving-on-our-own to cook the smaller meal with our American friends.  I gathered all my mom's best recipes, grabbed a friend with some turkey experience, and we turned out a great meal!

If this is your first time cooking for Thankgiving, or if you need to make improvements on certain elements of the meal, I can help you.  Let me share with you some of our family's favorite Thanksgiving recipes.

The Menu:
Turkey
Gravy
Mashed Potatoes
Stuffing (really, Dressing, for you etymologists)
Green Bean Casserole
Sweet Potatoes
Cranberry Sauce
Orange Rolls
And for dessert, Traditional Pumpkin Pie

Recipes and Tips:


The Turkey
There are a LOT of recipes out there, and it can get a little overwhelming.  I understand the stress, though.  After all, this is the star of the show!  But let me break it down a little for you.  First of all, you need several days to thaw a frozen turkey, so if you procrastinate you'll have to buy a fresh turkey.  You'll spend a lot more money, but your turkey will taste GREAT.  For a simple, great-tasting turkey (if not the fanciest thing on the block), use Reynolds oven bags found near the aluminum foil in the store.  Take out the neck, etc., from the body cavity.  Rub the turkey all over with salt and pepper and softened butter; fill the cavity with onion quarters and lemon quarters, and a couple sprigs of rosemary, if you want.  Shake 1 tbsp. flour in the oven bag.  Put the turkey in the oven bag, and then in a roasting pan (you can use an aluminum one).  Pour in a little  champagne or white wine, or chicken broth.  Tie up the bag and roast your turkey according to the directions on the roasting bag.  Let the turkey rest for about 30 minutes before carving.

Source


The Gravy
Pour the turkey drippings into a large bowl.  Let rest for 10 minutes.  Skim the fat off the top, and reserve it.  Measure the remaining drippings.  For every 2 cups of drippings you have (if you don't have 2 cups, add chicken broth to equal 2 cups), combine 1/4 cup flour with 1/4 cup reserved fat.  Throw the rest of the fat out (in a container in the trash - not in your garbage disposal or sink!).  Cook and stir fat and flour in a saucepan over medium heat for about 5 minutes to cook the flour.  Add drippings slowly, whisking constantly, until boiling.  Cook and stir for 1 minute more until thickened.  If you have lumps, just pass the gravy through a strainer.  Taste the gravy.  Add garlic salt, salt and/or pepper, a little bit at a time, to achieve the flavor you're looking for.
The easy way:  Make up a packet of McCormick's Turkey Gravy Mix.


Mashed Potatoes
We like our potatoes simple.  We peel and quarter russet potatoes and boil them in salted water until they break when we pierce them with a fork.  In the microwave, heat butter and milk.  (Use more milk than butter, in a ratio of about 2:1)  Mash the potatoes with a potato masher or fork.  Pour in a little of the milk/butter mixture.  Using a hand mixer, mix the potatoes, adding more milk and butter until creamy.
The easy way: Ore Ida's Steam N Mash potatoes are great!  You just microwave them in the bag and follow the directions on the bag to add milk and butter.


Source


Stuffing (ahem, Dressing)
We cook stuffing separate from the turkey because it can be unsafe to cook it in the turkey.  Here's my recipe:
1 1/2 cup celery, chopped
3/4 cup onion, chopped
3/4 cup butter
1 1/2 tsp. sage
3/4 tsp. thyme
1 can (8 oz) sliced mushrooms, drained (I think I'll use real ones this year)
1/4 cup peanuts, optional, but I like them!
12 cups dried bread cubes (appx. 24 slices)
1 1/4-1 1/2 cups chicken broth

(Serves 8-10)
Cook onion and celery in butter until tender, but not brown.  Add sage, thyme, mushrooms and peanuts.  Toss with bread cubes in a large bowl.  Add enough broth to moisten.  Dump it into a greased casserole dish (I use a Corningware dish.) Bake, covered, at 325 for 40-45 minutes, or at 375 for 20-30 minutes.

The easy way: Stovetop Stuffing!  It only takes 5 minutes on the stovetop, or you can bake it in the oven for more authenticity.


Source


TO BE CONTINUED...


Thursday, November 17, 2011

Ginger, My New Favorite Ingredient in Cookies

I'm on a ginger kick.  Have you noticed?

Have you ever seen a ginger root?  It's pretty strange looking.  It's one of those things that you might have seen in a grocery store, but never knew what you would do with it.  (Speaking of which, try a new game: have a friend - or a child - pick out something strange from the produce department in the grocery store and see what you can make with it!)

Here is what a ginger root looks like.


Strange, right?

To use it, you peel the root - you can use a paring knife or even a spoon for this - and you either chop it into pieces, mince it up with a knife, or grate it.  For grating a ginger root, you can use a microplane...


...or the small holes on a cheese grater.


Personally, I was trying to be cool and use my fancy kitchen gadgets, so I was using the microplane.  But it wasn't long before my fingers were bleeding (microplanes and clumsiness don't mix!) so I switched to the grater.

It freezes very well, so if you buy a ginger root for a recipe but then don't use it all (And who would?  Besides me, that is.) you can freeze the root, peeled or unpeeled, and take out just what you need when you need it.  No need to thaw it out.  In fact, it's even easier to grate if frozen!

Ginger is a handy root to have around.  For one thing, it is known to help cure nausea.  Mythbusters even proved on TV that ginger worked as well as pharmaceuticals to help people with motion sickness!  It's also said to be helpful with diarrhea and anxiety.  (Sorry I just used the d-word in a recipe post.)

If you aren't feeling well, ginger makes a great Get-Well tea.  My friends at Colorado College steep a ginger root in boiling water and then add a little lemon and honey.  Or you could try to go another route, like another CC friend, and just chew a hunk as is!  I don't really recommend that, though.


Personally, I love the flavor of ginger.  Made into cake or cookies, it has a sophisticated spicy-sweetness that evokes Christmas but somehow feels grown-up.

Recently I made a couple batches of ginger cookies, and I loved every bite.

I made these - Big Soft Ginger Cookies...


...and I made these - Chewy Chocolate Ginger Cookies.


The Verdicts:
Big Soft Ginger Cookies:
I got this recipe off of AllRecipes.com.  In the ginger cookie category, it was the clear "people's choice" winner.  I adapted the recipe for high altitude and to maximize the ginger flavor.  The verdict:  It's exactly what you're looking for in a ginger cookie.  It's pretty, mildly spicy, and soft.  The flavors melded together overnight and were even better the next day.

Chewy Chocolate Ginger Cookies:
This recipe came from my friend Pam (thanks, Pam!) a few years ago.  (A few?  Probably more like 12 years ago!)  Maybe you never thought about putting ginger and chocolate together, but once you taste these, you'll wonder why you didn't do it sooner!  The verdict: These cookies take the beauty of ginger and spice cookies and do them one better!  Adding the chocolate flavor, you don't lose any of the perfection of the ginger cookie; you only amplify it, and improve on it with a fudgy texture and a hit of cocoa.

Now, do yourself a favor and bake these cookies.  If you throw them in the freezer as soon as they cool, you can add them to your holiday platters all season long.

Here are the recipes!

Big Soft Ginger Cookies
Makes 2 dozen
(adjusted for altitude.  See the original recipe here.)

2 1/4 cups plus 1 tbsp. flour
2 tsp. ground ginger
3/4 tsp. baking soda
3/4 tsp. cinnamon
1/2 tsp. ground cloves
1/2 tsp. salt
1/2 cup butter, softened
4 tbsp. shortening
3/4 cup + 2 tbsp. sugar
1 egg
1 tbsp. orange juice (or water)
1/4 cup molasses
1/2 tbsp. fresh ginger, grated
2 tbsp. sugar

Preheat oven to 375.  Whisk together the flour, ground ginger, baking soda, cinnamon, cloves, and salt.  With a mixer, cream the butter, shortening and sugar together.  Add the egg, orange juice (or water), molasses, and fresh ginger.  Mix well.  Slowly add the dry ingredients.  Roll into medium-large balls.  Roll in sugar, place 2 inches apart on cookie sheet.  Bake for 8-10 minutes, until cracked on top and barely done.  (Don't overbake them!)


Chewy Chocolate Ginger Cookies
Makes 2 dozen

1 1/2 cup + 1 tbsp. flour
1 1/4 tsp. ginger powder
1 tsp. cinnamon
1/4 tsp. cloves
1/4 tsp. nutmeg
1 tbsp. unsweetened cocoa powder
1/2 cup butter, softened
1 tbsp. fresh ginger, grated
1/2 cup brown sugar
1/2 cup molasses
1 tsp. baking soda
1 1/2 tsp. boiling water
1 cup semisweet chocolate chips
1/4 cup sugar

Whisk together the flour, ginger powder, cinnamon, cloves, nutmeg, and cocoa.  With a mixer, beat butter and ginger.  Add brown sugar and molasses and mix well.  In a small bowl, combine baking soda and boiling water.  Add half the flour mixture, then the baking soda mixture, then the remaining flour mixture.  Combine well.  Wrap dough in plastic wrap and chill for 2 hours or overnight.  Roll into medium-large balls.  Roll in remaining sugar.  Keep dough balls in the refrigerator while other cookies are baking.  Bake at 325 for 10-12 minutes until just cracking.  (Don't overbake!)

Which cookies will you try?

Monday, November 14, 2011

Braised Short Ribs

Last night I had a cooking hey-day.  I made three - count them! - new recipes for dinner, just for fun!  And to share the wealth, we invited Steve's mom over for dinner.

You see I've been studying under the master, and I'm finally learning how to make beautiful things out of different cuts of beef.  (In case you were wondering, the master is Ree Drummond, the Pioneer Woman.)  Combine my budding education with the great new kitchen tool I got from my mother-in-law, and you have fine cuisine!

This is the kitchen tool:


It's my beautiful red cast iron dutch oven from Cooks.  It hold five quarts, and is made from enameled cast iron.  The beauty of that is that it cooks like cast iron (holds heat well, moves from stove to oven) but you can wash it with soap.  (Note: never wash regular cast iron with soap!)  And the colors are so pretty!  Interested in buying one?  Shop here.  (Good news, I just noticed it's on sale for $59.99 now, down from $139.99.)

I've been using my pretty new dutch oven for braising meats, first pot roast, and now short ribs!  I've learned from PW that you need to layer the flavors in the pot: first cook up some bacon, maybe, then some veggies, then brown the meat.  Then you deglaze the pan with a little wine or stock.  After that you add everything back in, throw in a few herbs for good measure, and stick it in the oven for a long time at a low temperature.  And I mean a long time.  Have you ever had a tough pot roast and assumed that you overcooked it?  Me, too!  But I learned that that's wrong!  If you're cooking low and slow and your meat is tough, you haven't cooked it long enough.  It has something to do with breaking down the connective tissues and all that.  (Ain't I smart?)

Following PW's heartfelt instructions, I served the short ribs on a bed of Creamy Goat Cheese Polenta.  Hubby also made up some mashed potatoes just in case the polenta was too frou-frou for him.  Ultimately, the polenta was very tasty - definitely a keeper.  But we felt like these short ribs were begging for the more manly potatoes.  Give them a try and see what you think!

Any by the way, these short ribs weren't on sale, which meant that they cost me $20.  Expensive, right?  But then I realized that the five of us ate for $35 total that night, and the meal was definitely restaurant quality, if not better.  So I think for an occasional treat, it's not too bad.  But for now on, I'll keep an eye out for sales on short ribs.

All the recipes are below.  For a step-by-step photo tutorial, see PW's cooking blogs: Braised Short Ribs & Creamy Goat Cheese Polenta.

I'm so sorry - this photo makes it look almost gross.  Look at PW's site for good photos!

Braised Short Ribs
Serves 4 (or 3 adults and 2 kids)

6 slices pancetta (or save yourself $4 and use 3 slices bacon), chopped
8 short ribs, bone-in
salt & pepper
1/4 cup flour
2 tbsp. olive oil
1 onion, diced (1/2 onion would be fine)
3 carrots, diced
2 cups red wine (I used wine, but you can substitute broth)
2 cups beef broth
2 sprigs thyme (I keep some in my freezer, actually)
2 sprigs rosemary (I used a couple shakes of powdered rosemary, from Penzey's)

Preheat oven to 350 degrees.

Season short ribs with salt and pepper.  Dredge in flour.  Set aside.

In a large (5 or 6 qt.) dutch oven, cook pancetta on medium heat until crisp.  Remove to a plate.

Add olive oil and turn heat to high.  Brown short ribs on all sides (for no more than 45 seconds per side).  Do it in batches if necessary, to not crowd the pan.  Remove to a plate.  Reduce heat to medium and add onion and carrots.  Cook and stir until they start to soften.  Add wine and whisk to get up all the browned bits on the pan.  Cook for 2 minutes.  Add broth, 1 tsp. salt and some pepper.  Return short ribs to the pan, nestling them in so all are mostly in the liquid.  They should be almost covered with liquid.  Add water if necessary.  Return pancetta to the pan, and add herbs.  Cover and place in oven.  Cook for 2 hours.  Reduce heat to 325 and cook 30-45 minutes more.  Remove from the oven.  Let sit for 20 minutes.  Then skim off the fat which has risen to the top.  Serve 2 short ribs to each person, over polenta or mashed potatoes.  Spoon extra sauce over the top, if desired.


Creamy Polenta with Goat Cheese
Serves 8

4 1/2 cups water
1 cup cornmeal (I milled popcorn in my Nutrimill on the coarse setting)
1 tsp. salt
2 tbsp. butter, room temperature
4 oz. goat cheese, room temperature

Bring water to a boil.  Slowly whisk in cornmeal.  Add salt.  Reduce heat to low, and cook, stirring often, for 15 minutes. (At high altitude I used slightly more water and cooked about 18 minutes.)  Stir in butter and goat cheese.

Friday, November 11, 2011

Playful Pot Pies


I was scrolling through Halloween recipes on TastyKitchen.com and I asked my kids what they wanted me to make for them.  Would it be the spider cookies?  Candy Corn krispy treats?  Spooky cupcakes?  No!  Owen wanted chicken pot pies. Isn't he strange?

Well, it took me a while, but I finally got around the making the chicken pot pies for our family.  Playful, little, individual pot pies with great flavor and kid-appeal!  The pot pies were each topped with a letter for each of our names: T for Teo, O for Owen, M for Mommy, and D for Daddy.  They were in cute little individual souffle dishes in four different colors, courtesy of Cost Plus World Market (WAY cheaper than Bed, Bath & Beyond, by the way).  In fact, they looked so great that Steve asked me if I took a picture.  I thought that was a funny thing to ask, and completely missed his point that I might want to blog about them.  So, unfortunately I don't have a picture for you.

But the good news is that I do have a recipe!  This is a new family favorite.

Here it is!

Individual Chicken Pot Pies
Serves 4

1 recipe pie crust, or 1 sheet puff pastry, thawed
2 1/2 lbs bone-in chicken breasts or appx. 2 lbs. boneless chicken breasts (I used 1 1/2 very large breasts)
3 tbsp. butter
1/4 onion, chopped
2 celery ribs, chopped
1 carrot, peeled, chopped
3 tbsp. flour
1 3/4 cup chicken broth
1/4 cup cream
1/4 tsp. rubbed thyme
1/4 cup fresh parsley, chopped, or 1 tbsp. dried parsley
1 bay leaf
salt and pepper to taste

If using bone-in chicken: Rub chicken with olive oil and season with salt and pepper.  Roast on a baking sheet for 40-60 minutes until juices run clear.  When cooled enough to handle, remove meat from bones and chop into bite-sized chunks.

If using boneless chicken: Season chicken with salt/pepper.  Chop; and cook over medium-high in a pan with a little olive oil until browned and cooked through.  Remove from pan and chop (again - to make the pieces smaller).

In a medium saucepan, melt butter.  Add onion, celery and carrots.  Cook, stirring, over medium-high until soft.  Add flour.  Cook and stir for 1-2 minutes.  Slowly whisk in broth.  Then stir in cream, thyme, parsley, and bay leaf.  Boil, stirring, until thickened.  Reduce heat to medium-low and stir in chicken.

Meanwhile, cut puff pastry or pie crust using cookie cutters or a knife.  (I cut large block letters using a knife.)  Place on a baking sheet covered in parchment paper.  Brush with egg wash (egg and water).  Bake at 400 degrees (for pie crust) or 350 (for puff pastry) for about 10 minutes until lightly browned.

Pour chicken filling into 4 individual ramekins or souffle dishes.  Top each with "crust cookies."  Serve immediately.

Thursday, November 10, 2011

Gingerbread Showdown

Only hours after I wrote my last post about gingerbread (Gingerbread! Oh my!) I saw the Food Network feature a gingerbread on Diners, Drive-Ins, and Dives.  The gingerbread was from a restaurant in Denver called Bang!  (It's not that I'm excited about the name of the restaurant, it's actually called Bang!, with an exclamation point.)  Well, hurray for the internet, because I was able to find the recipe, on a site called 5280.com, dedicated to Denver. (Do you get the reference?)

So the Kammer household had a gingerbread showdown.

Gingerbread A - Pie in the Sky Gingerbread:


Mild, sweet, pronounced ginger flavor.  I discovered that I loved it best plain, warmed in the microwave for a few seconds, as an afternoon snack (or even for breakfast!).  You can find the recipe here.

Gingerbread B - Bang! Gingerbread:


Darker, more intense, spicier, more assertive.  I left this piece plain for the picture, but I think this gingerbread would be a better match for a Lemon-Rum Sauce, or the Pear-Raspberry Sauce. (You can find the recipes here.)

So, in the end, which gingerbread is better?  Wouldn't you like to know?!  Ultimately, I preferred the Gingerbread A, but Steve preferred Gingerbread B.  (The kids didn't participate because I didn't share with them.  Ha!)  I think if you want to know which one you like better, you'll have to have your own showdown!

Here's the recipe for Gingerbread B:

Bang! Gingerbread
Serves 20, more or less

1 1/2 cups water, boiling
1 1/2 tsp. baking soda
1/2 cup butter, room temperature
1 cup sugar
1 cup dark molasses (I recommend Brer Rabbit's Full Flavor)
2 tbsp. finely minced fresh ginger
1 lemon, zested
3 1/2 cups flour
2 tsp. cinnamon
1 1/2 tsp. baking powder
1/2 tsp. ground cloves
1/4 tsp. salt
3 eggs.

Combine boiling water and baking soda.  In another small bowl, combine fresh ginger, lemon zest, flour, cinnamon, baking powder, cloves, and salt.  In a large mixing bowl, cream together butter and sugar.  Add molasses and cream until light.  Add in water and soda mixture and flour mixture alternately, blending well after each addition.  Add eggs, one at a time.  Beat for an additional 2-3 minutes.  Pour into a greased 9x13 pan.  Bake at 350 for 45 minutes.

Monday, November 7, 2011

Oreo Pretzel Bark for All Occasions


Recently I discovered a quick and easy and delicious recipe for all occasions.  It consists of 3 ingredients, two of which are named in the title: pretzels, oreo cookies, and vanilla flavored melting chocolate.  (I used CandiQuik candy coating.)  Besides that, you can add anything that's appropriate for the occasion, such as candy corn for Halloween, candy canes for Christmas, colorful sprinkles for birthdays, etc.

Here's how you do it:

Line a 9x13 pan with aluminum foil and grease it.  Cover the bottom with broken pretzels and Oreos, no more than two layers deep.  I used more pretzels than Oreos - maybe 1 cup pretzels and 15ish Oreos, broken into quarters.  Dump them from the pan into a medium bowl.  Melt the candy coating in the microwave according to package directions.  Pour over the pretzels and Oreos in the bowl.  Stir to coat everything evenly.  Spread it evenly in the lined, greased pan.  Top with a seasonal treat if desired (such as candy corn).  Refrigerate until hardened.  Remove from the pan.  Peel off foil.  Cut or break into serving-sized pieces

Saturday, November 5, 2011

Gingerbread! Oh my!

Source: Pink Paper Peppermints


Fall is designed for baking.  The weather starts to cool off, and the thought of turning on the oven no longer makes me want to run.  And fall brings to mind pumpkin, apples, squash, spices, caramel...all of which are fodder for great baking!

Last night I was looking for something seasonal to bake.  Steve's not a fan of apple pie (What???!!) so I decided to whip up a gingerbread.

I used a recipe from Pie in the Sky, a high-altitude cookbook, which yields such beautiful, perfectly risen results.  This gingerbread has a great tang from the ginger - one whole tablespoon of fresh ginger! - and is dense and moist, perfect for a fall evening.


I topped it with whipped cream (from a can) with a little fresh-grated nutmeg on top.  Have you ever seen a whole nutmeg?  I got mine from Penzey's, a spice store on N. Academy.


The flavor, when you grate it fresh with a microplane is out of this world.   Not to mention it looks pretty and fancy.  (Want to buy a microplane?  I love to get my baking tools at Ace Hardware.  Their selection is great and prices are good.)

What to top a gingerbread with can be the source of great discussion.  It tastes great alone; how about a simple dusting of powdered sugar?  Or take it just a step further, like I did, with whipped cream.  Or what about a Raspberry-Pear Sauce (yum!) or Lemon Rum Sauce (yum!)?  Take your pick!

Here are some recipes:

Out of This World Gingerbread
Serves 9 (very generously)

2 1/2 cups flour
1/2 tsp. baking powder
1/2 tsp. plus 1/8 tsp. baking soda
3/4 tsp. salt
2 1/2 tsp. ground ginger
1 tsp. cinnamon
1 stick butter, softened
1/2 cup plus 2 tbsp. sugar
2 eggs, room temperature
2/3 cup sour cream
1-2 tbsp. grated fresh ginger (I used 1 tbsp.; next time I'll try 1 1/2)
1/2 cup unsulfured molasses
1 cup hot water

In a medium bowl, whisk together flour, baking powder and baking soda, ginger, cinnamon, and salt.  In a large bowl, blend butter and sugar.  Add egg.  Add sour cream and fresh ginger, and blend well.  In a measuring cup, combine molasses and hot water until molasses is dissolved.  Add it to the sour cream mixture alternately with flour mixture.  Pour batter into a greased 9x9 inch square pan.  Bake at 375 for 40 minutes.  Serve warm.

At sea level: Use 1 tsp. baking soda, 1/2 tsp. salt, 1 egg, 1/2 cup sour cream, and slightly less fresh ginger.  Bake at 350 for 35 minutes.


Raspberry-Pear Sauce
10 oz. frozen raspberries, thawed or fresh raspberries
1/4 cup sugar
1 tbsp. lemon juice
3 firm pears, peeled, cored, and chopped

Drain frozen raspberries, if using.  Reserve 1/4 cup juice.  In a blender, blend raspberries and reserved juice (or 1/4 cup water) until smooth.  Strain to remove seeds.  In a saucepan, combine raspberry puree, sugar, lemon juice and pears.  Bring to a boil over high heat.  Reduce heat and simmer until pears are tender.  Serve the sauce warm over gingerbread.


Lemon-Rum Sauce
1 egg
1/4 cup water
1 cup sugar
1/8 tsp. salt
1 tsp. grated lemon zest
3 tbsp. lemon juice
1 stick butter, cut into pieces
3 tbsp. dark rum, to taste

In a small pot, whisk egg and water.  Add sugar, salt, lemon zest, lemon juice, and butter.  Whisk over medium heat to melt butter and dissolve sugar.  Increase the heat to medium-high and whisk until boiling.  Continue to whisk for 1 minute more.  Strain; then add rum to taste.  Serve warm.

Saturday, October 29, 2011

Twice-Baked Sweet Potatoes

I love fall.  I love corn mazes and apple cider and apple pie and apple bread pudding and apples...  I love squash and scarecrows and the pumpkin patch...and pumpkin bread and pumpkin muffins and pumpkin pie...

Yesterday at the store, while we were buying pumpkins for Halloween (Need one?  King Soopers on Austin Bluffs/Academy has lots.) I picked up two sweet potatoes.  (Yams?  I really don't know the difference.)  I didn't know what I was going to make with them, but I wanted to celebrate fall and they sounded good.

So after a search on the internet, I found this recipe, which I kept very nearly the same, and will share with you below!  (It's from The Neely's on the Food Network.)


Twice-Baked Sweet Potatoes
Makes 1 large or two small servings

1 medium sweet potato (yam?  I used the orange-colored kind.)
1 tbsp. butter
2 tbsp. cream cheese
1 unpacked tbsp. brown sugar
2 tbsp. milk
dash nutmeg
dash cinnamon
dash ginger
salt and pepper

Bake the sweet potato on a baking sheet at 375 for 1 hour.  (That wasn't long enough for me, so I turned the oven up to 400 and baked an extra 10 minutes.).  Scoop the flesh from the shell, and mash it with the rest of the ingredients.  Place in a greased individual souffle dish. Sprinkle some brown sugar on top.  Bake at 375 for 10 minutes.  Then broil for about 2 minutes to really caramelize that sugar.  You're done!  Eat it. :)

Mmmm...Fall yumminess!

Now it's your turn.  I have two questions for you:
1.  What would eat with these Twice-Baked Sweet Potatoes?
2.  What's your favorite fall recipe?  Please be my new best friend and share it in the comments.

Monday, September 26, 2011

Chicken Marsala...As I Promised

I haven't been cooking a lot lately.  It could be that Kai is keeping my busy.  It could be that I'm not getting enough sleep to be able to do anything productive.  And I know it doesn't help that Kai's sensitive stomach has forced me to cut out all the most interesting foods from my diet.  So, likely because of all that, my diet these days generally consists of cereal, pb&j, pop tarts, and Luna bars.  Yep.

So it gave me ENORMOUS pleasure the other day to cook a wonderful meal of Chicken Marsala, mashed potatoes, and peas for my family.

"Look, kids!  Real food!"

In fact, this meal was so pleasing, it actually motivated me to start blogging again!  I thought this recipe must be shared!

Here it is.  (Oh, and you should know that I didn't take any pictures when I made it, so I grabbed a very similar-looking picture off the internet.  Thanks, Tyler Florence!  But no, his recipe is not the same as mine.)

Photo source here

Chicken Marsala
4 boneless, skinless chicken breasts, pounded to 1/2 inch thickness
1/4 cup flour
1/2 tsp. salt
1/2 tsp. oregano
1/4 tsp. pepper
1/4 cup butter
2 tbsp. olive oil
8 oz. mushrooms, sliced
1/2 cup Marsala wine
1/4 cup cooking sherry

In a large ziploc bag, combine flour, salt, oregano and pepper.  Shake chicken pieces, one at a time, to coat.  In a large pan, melt butter in oil over medium-high heat.  Add chicken and brown on one side.  Turn chicken over.  Add mushrooms, marsala wine, and cooking sherry.  Cover, reduce heat to medium and cook for 10 minutes until chicken is fully cooked.

Serves 4.

Note: This recipe goes great with regular mashed potatoes and a green vegetable.  And it's spectacular with garlic mashed potatoes and asparagus!  

Why, yes, I will share that garlic mashed potatoes recipe with you.  Soon.  Stay tuned!


And if that Chicken Marsala recipe sounds too complicated to you (it's really not - 30 minutes, tops - but we all lead busy lives), Carrabba's Italian Grill offers a great version on their regular menu.

Tuesday, June 14, 2011

Feeding a Crowd


Last night, just like every Monday night, I had twenty people over to our house for dinner.

Does that sound intimidating?  Yeah, it really can be.  You should see Steve and I as we face the day preparing for the crowd.  Generally one of us (that'd be me) kind of breaks down at one point in time, and Steve has to talk me off the ledge.

Case in point: Last night I had everything timed perfectly.  I was very proud of myself because I was going to have four pans of chicken, two pans of cheesy potatoes, and a fruit salad all ready perfectly in time for our first arrivals.  But I suddenly realized that I had turned off the oven accidentally and the food wasn't cooking!  And you know how it goes from there.  Next I pulled out the aluminum foil and the whole roll fell out of the box and unrolled across my kitchen floor.  And then I went out to the refrigerator in the garage (yay - new fridge!) and discovered that I couldn't quite open the door because someone (ahem) had pulled the car in too far.  I had a slight mental breakdown.  Steve was very kind and told me (ordered me, commanded me) to sit down and chill.  So I plopped on the couch, faced the fan directly at me, and spaced out for a few minutes.  That helped.

So my point is that I feed crowds.  It's not always easy, I admit, but it's totally worth it for the ministry and community that happens during those meals.

I do, though, have some tips for feeding large crowds to help make it slightly less stressful.

The Top Seven Tips for Feeding a Crowd:
1.  Feed College Students.
They are hungry; they are impressed with everything you make; and they don't notice the dirty corners of the house.

2.  Clean in Advance.
My best system is to pick up stuff around the house the day before and then do a little bit of deep cleaning the morning of the day I expect the guests.  I get the kids helping, too.  Basically, it's best not to try to do all the cleaning and cooking on that one day.  Talk about overwhelming!

3.  Simplify.
Put time and effort into one part of the meal, and then simplify the rest.  For example, if you make homemade lasagna, pair it with packaged salad and frozen garlic bread.  Or make a great pulled pork for sandwiches, but then serve it with chips and watermelon.

4.  The Rule of 1.5.
To figure out how much food to make, take the number of people you expect, plus a few to be safe, multiply that number by 1.5, and make that many servings of your dishes.  Oh, and feel free to use the number of servings listed on packaged items to help you figure out how much to buy.

So, when I make lasagna, I know that I will cut each pan into 12 pieces.  I expected 20-ish people.  I added a few to be safe (24).  I multiplied 24 by 1.5, which equals 36.  So I needed 36 servings of lasagna...3 pans.

Did I just lose you?  Sorry.

5.  The Buffet Principle.
You should know that people eat significantly less when the food is served buffet-style.  If the food is in front of them, they help themselves to seconds, thirds.  But if they have to get up to get more, they procrastinate, try to finish a conversation first, or just plain feel lazy, and then usually change their minds and don't bother.

My Rule of 1.5 applies to meals served buffet-style.  If you are serving a tabled meal to 20 year-old guys, you should probably multiply by 2 instead.  I'm just sayin'.

6.  Make A Complete Grocery List.
I'm going to get very specific here, because that's how I am.  On the top right side of a piece of paper, write down your menu.  That's something like: lasagna, salad, garlic bread, angel food cake w/ fruit and cool whip, soda.  Then, working your way through that list, write down every ingredient needed for each element of the meal.  Don't write "salad."  Write "lettuce, red pepper, carrots, 2 dressings, croutons."  Make sure you remember condiments.  And make sure you remember serving necessities, like "dinner plates, forks (enough for dessert, too), knives, napkins, cups, dessert plates."  And don't make the mistake I make every week:  Remember the ice!

7.  Aluminum Rocks
Use aluminum pans for easy clean-up.  Enough said.


So there you have it: my top seven tips for feeding a large crowd.  Now you can do it like a pro!


Oh, and here's the meal you should feed them:  (This is what I made our guests last night)


Salsa Chicken:  Frozen chicken tenderloins (not thawed), sprinkled on both sides with taco seasoning, topped with salsa. Baked 35 minutes at 375; top with cheddar cheese and bake until melted.

Cheesy Potatoes: (This is your more complicated dish.  Serves 12-16).  Saute one onion in butter until softened.  In a large bowl, stir together 2 lbs. frozen hash brown potatoes, onion with butter, one can condensed cream of chicken soup, one cup sour cream, and 2 cups cheddar cheese.  Pour into a large, shallow baking dish, bake at 375 for 1-1 1/2 hours.

Fruit Salad: Apples, grapes, etc., all chopped up and mixed with cool whip.  My trick: I stir in a couple chopped up Snickers for good measure.  We make a party game out of it.  (Who can guess the secret ingredient?)

Sodas: One 2-liter for every six people, plus water.

Angel Food Cake with Chocolate Mousse and Toffee Bits:  Storebought angel food cake.  "Super-cheat chocolate mousse" which is Hershey's syrup stirred into cool whip, and toffee bits (from the chocolate chip aisle) on top.

Saturday, June 11, 2011

Nilla Snacks

Don't underestimate this snack.

I found the "recipe" on the back of a Nilla Wafers box in college.  Made them once and loved them.  Then I forgot about them for 14 years.

Owen and I stayed home one evening about a week ago because he wasn't feeling well.  I suddenly remembered these snacks and thought they would be a fun treat to try again.

Oh, my goodness!  These are good!  Why did I ever go so long without eating them?!

Here's what you do:


Take a couple Nilla Wafers and spread them with peanut butter.


Cut large marshmallows in half...


...and set a half on top of each Nilla Wafer.


Broil for 2-3 minutes in your oven's broiler, until they are done how you like them.


That's it!


Confession time:  I ate all these and didn't even tell my kids I had made them.  (Insert evil laugh.)

Thursday, June 9, 2011

My Coleslaw

Yesterday I visited Phat Hatties, the barbecue truck on the corner of Union and Academy.  As I mentioned, Steve and I really liked it.  But I did say, "I like my coleslaw better."


Sometimes I wonder, "Does anyone really like coleslaw anymore?"  I'm not sure it's that big of a deal in Colorado.  Personally, I grew up on it.  My dad likes it, so we had it with all your typical coleslaw meals - barbecue, fried chicken, .

My favorite coleslaw, though, is at Chick-Fil-A.  The dressing is so tasty and the vegetables are fresh.  When I worked at Chick-Fil-A in college, we actually had a customer who would come in each week just to buy the coleslaw dressing.

Well, I hate to buy something when I could make it myself, so I found a recipe for coleslaw on AllRecipes.com, and adapted it to our tastes.

Here's the recipe:

Coleslaw
Serves 8-12 (Coleslaw generally goes pretty far in a group of Coloradoans.)

1 (16 oz.) bag coleslaw mix
2 tbsp. diced onion
2/3 cup mayonnaise (The original recipe calls for Miracle Whip.  I'm not a fan, but feel free to use that if you prefer it.)
3 tbsp. vegetable oil
1/3 cup white sugar
1 tbsp. white vinegar
1/4 tsp. salt
1/2 tsp. poppy seeds, optional (I always forget them.)

In a medium bowl, combine coleslaw mix and onion.  In a small bowl, combine remaining ingredients.  Pour the dressing over the coleslaw mixture and toss to combine.  It will seem dry at first, but don't worry about that, it will be perfect after it rests.  Refrigerate for 2 hours or more before serving.

Tuesday, May 31, 2011

Photo Tutorial: How to Cut up a Pineapple

I love pineapple.  You might have picked up on that if you've been following me on Facebook at all.  But the thing is, I don't always love pineapple.  Usually I can take it or leave and generally I choose to leave it.  So I should amend what I said...

This baby (in my tummy) loves pineapple.  These days I eat it daily, about a pineapple a day, in fact.

Today I wanted to pass on what I've learned about choosing a good pineapple and how to cut it up.  Those little suckers can be intimidating with all their prickly parts.  But never fear, after today you'll be a confident pineapple eater.


LESSON 1: Picking a yummy pineapple

A ripe pineapple is sweet and hardly tart.  The trick is, you gotta smell the stem (right where the top meets the fruit), and then smell the...butt.  It should smell like yummy pineapple.  What I mean is, when it's in your cart as you walk around the store, you should keep thinking something along the lines of, "Yum, something smells like pineapple.  Oh yeah, that's my pineapple."

A few days ago at Costco I could smell the pineapples a few feet away.  Yesterday at Target I couldn't smell them at all.  The produce guy tried to tell me that they were ripe - that I should pay attention to color, not the smell.  Oh, no no no, silly man.  Fortunately, he asked another produce guy who agreed with me about the smell thing, and who promptly went to the back and found me a nice, ripe, smelly one.  (Yeah, I know that doesn't sound good, but with pineapple I promise it is.)


LESSON 2: How to Cut up a Pineapple

1.  Twist off the stem.
(You could cut this.  I don't know why, but I get a lot of joy out of twisting off the stem.)

2. Cut off the top and bottom of the pineapple fruit.


3.  Cut the pineapple in half, lengthwise.


4.  Cut it again, into quarters, lengthwise.


5. Cut out the core from each quarter.


6. Cut off the skin from each quarter.


7. Cut out each "divot" with the end of a potato peeler.


8.  Slice each quarter into 3 pieces, lengthwise, and then chop.


And there you have it - beautiful, ready to eat pineapple!  I keep it in the fridge and grab a few bites of it here and there throughout the day.

Enjoy the summer's bounty!

Oh, and after about five minutes of detailed, careful research, it seems that the best price on pineapple this week is Walmart, for $2.50.  But don't forget, a pineapple isn't worth any price if it isn't ripe, so make sure you smell that sucker!